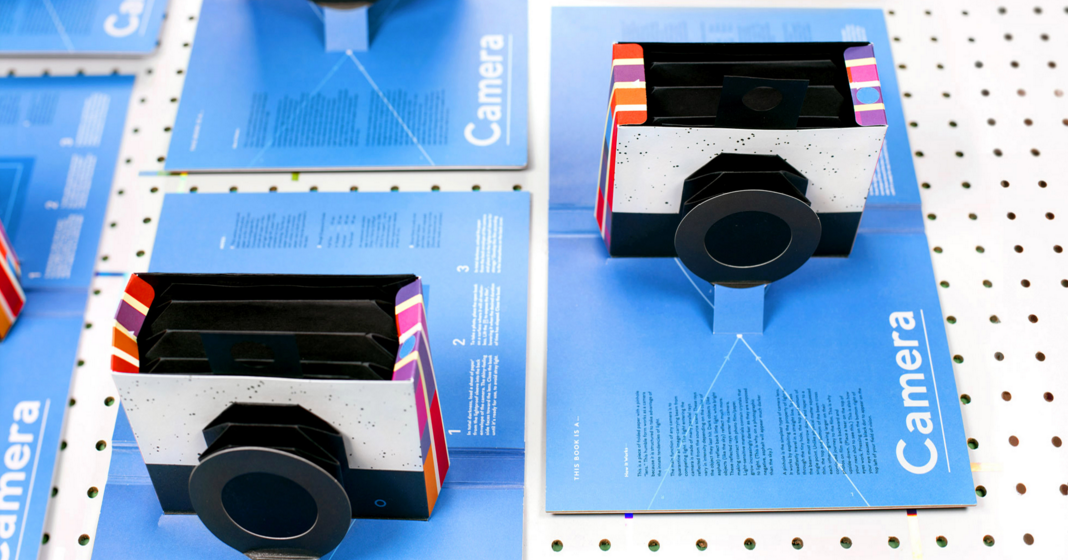
Yes, This book is a camera. This is a working camera within a pop-up book.
It concisely explains—and actively demonstrates—how a structure as humble as a folded piece of paper can tap into the intrinsic properties of light to produce a photograph.
How it Works
This camera is simply a piece of folded paper with a pinhole “lens”. Its humble structure is functional because it taps into how light behaves in the universe.
The main function of any camera is to isolate a beam of reflected light from the cacophony of other sources. The light entering the camera is comprised of numerous parallel rays. These rays vary in intensity depending on the color of the object that they last hit. Dark objects (like a black t-shirt) reflect back little light, while bright objects (like a white hat) reflect proportionally more, These reflected rays enter the camera, making contact with photo film or paper, Photo film and paper contain light – sensitive crystals which grows increasingly darker in proportion to the intensity of light to which they are exposed.
A pinhole is the simplest type of camera lens. It works by exploiting the tendency of light to steadfastly travel in a straight line. To pass through this tiny space, the top and bottom of the beam must squeeze down and taper to a single point. Unlike physical matter squeezed thin, the top and bottom of the beam end up crossing each other, growing larger again on their continued journey to the film. This accounts for why images captured in a camera are backward and upside-down. (Place a tear on the top of your next photo to demonstrate this) Incidentally, this is also how eyes work. Pressing on the bottom-right of your eye causes a black dot to appear on the top-left.
How to use it as a camera
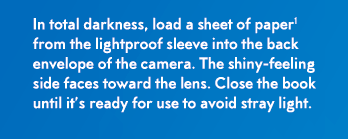
1.) Open the Book and lock the tabs to open fully
Achieving this specific focal length is important—the tabs also help to keep the book flat, rigid and hold steady.
Be sure to unlock those tabs before closing again! When bent backwards, they lose their functionality.
2.) Insert photo paper (or film…any light-sensitive material will do)
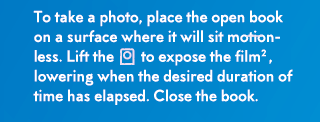
3.) Shoot a photo by raising the shutter for the desired exposure time.
Exposed photo paper will “keep” for months, so you can store your undeveloped photos in a light-tight envelope and develop them all at once if you want.
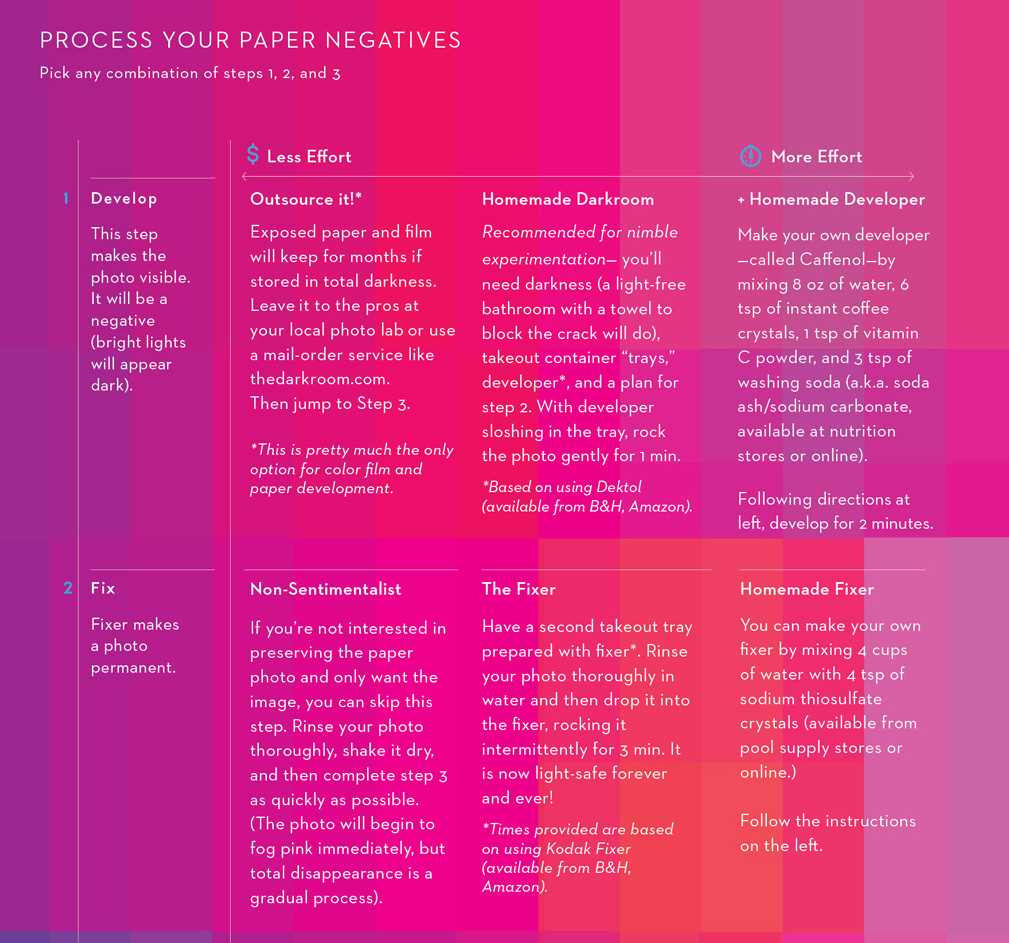
4.) Develop your photographic negative.
Be as DIY or as outsourcey as you wanna be. Here is a chart:
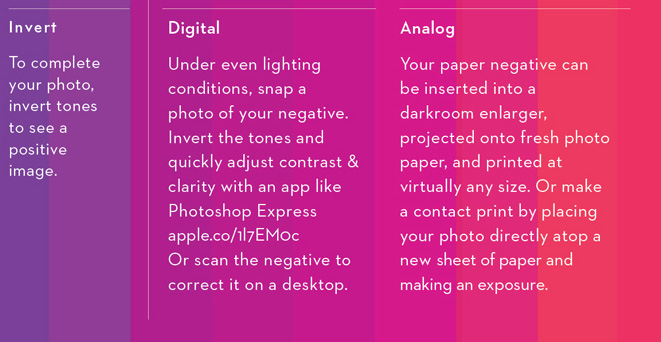
5.) Invert and correct it!
Analog cameras produce photographic negatives. The crystals in photo paper and film grow darker as they are exposed to light (so the sun will sow up as a black dot.) I’ve found that the easiest way to get from pinhole negative to corrected final photo is to snap the negative (in even lighting) and correct it with the free Photoshop Express app. (It is truly the most nimble way to get an image—been using it to prototype for months now as it is so much faster than scanning when you need a quick image.)
Some notes:
This Book is a Camera, comes with detailed instructions and a starter pack of B/W Ilford photo paper (any 4×5” or smaller light-sensitive material can be used). There is nothing to assemble, but if you want to use it as more than a book, you need to feel alright with the concept of pouring developer into an old takeout food container and sloshing it around in the dark… while counting. The project was supported in part by the Adobe Creative Residency (and produced in multiples byStructural Graphics).
Link: Purchase here
